How to Choose the Right Self Priming Pump?

Choosing the right self priming pump is not simply a matter of comparing motor power or discharge size. The real decision begins at the installation site. Measure the suction lift, pipe length, fluid temperature, viscosity, and expected flow rate. A pump working beside a muddy excavation faces different demands from one transferring clean process water.

Pump engineer Igor J. Karassik once observed, “The pump is the heart of any process system.” That statement remains practical today. A poorly matched pump can overheat, lose prime, vibrate, or consume unnecessary energy. In the field, small details often decide performance. A blocked foot valve, an undersized suction pipe, or an air leak at one fitting may stop an otherwise suitable unit.

Start with the liquid. Does it contain sand, fibers, chemicals, or trapped air? Check the manufacturer’s performance curve, maximum suction lift, solids-handling capacity, and priming time. Do not rely on a catalog’s highest flow figure alone. It may describe ideal laboratory conditions.

Experience also suggests checking maintenance access before purchase. Can operators reach the impeller? Is the mechanical seal replaceable without removing the entire pump? These questions are easy to overlook. They should not be.

The final choice should balance performance, reliability, lifecycle cost, and verified operating conditions. Manufacturer data is valuable, but site measurements are better. Even experienced engineers can misjudge a system. That is why a careful review, a realistic duty point, and honest attention to installation limits matter when selecting a self priming pump.
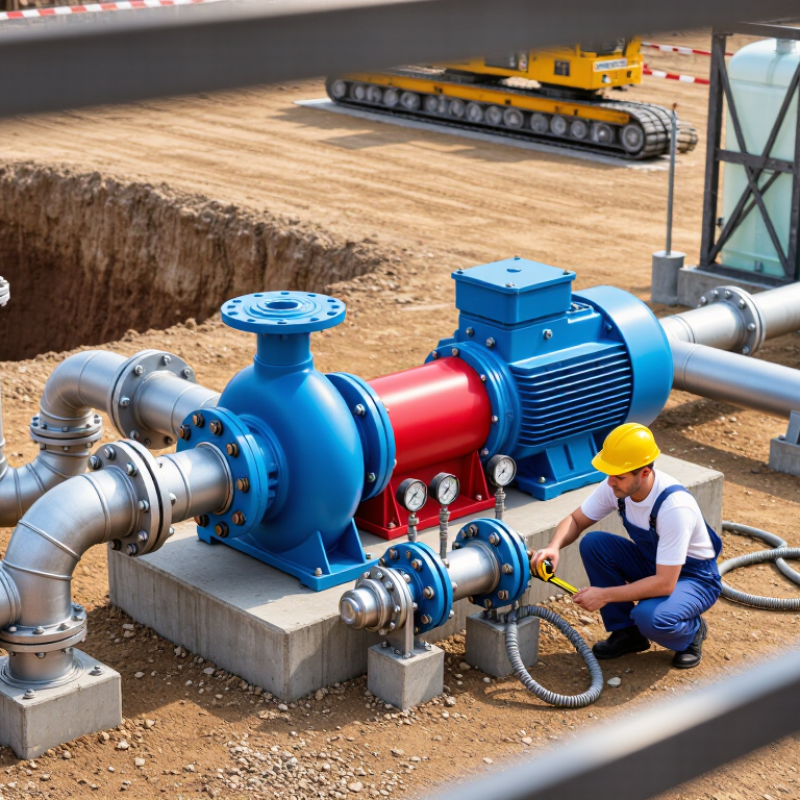
How to Choose the Right Self Priming Pump?

Understanding How Self-Priming Pumps Work

How to Choose the Right Self Priming Pump?

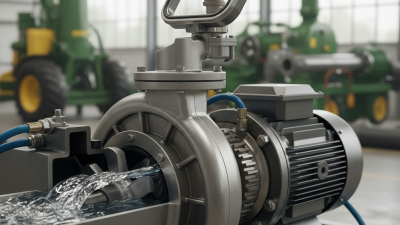
Choosing a self-priming pump starts with understanding its working principle. Unlike a standard centrifugal pump, it can remove air from the suction line. The pump casing holds some liquid after shutdown. When restarted, the impeller mixes trapped air and liquid. This mixture enters the separation chamber. Air exits through the discharge line, while liquid returns to the impeller. The cycle continues until the suction pipe fills. That is self-priming in practice. Not magic.

In field inspections, performance depends on installation as much as design. Keep the suction pipe short, sealed, and gently rising toward the pump. Even a tiny leak can pull air inward. That leak may look harmless. It can prevent priming completely. Excessive lift, high liquid temperature, or heavy solids can slow the process. Check the stated suction lift and air-handling capacity. These figures matter more than attractive flow claims. A suction gauge can reveal restrictions. So can irregular noise.

When choosing, match flow, head, liquid properties, and restart frequency. Confirm casing material, seal compatibility, and maintenance access. Test the pump with the actual pipe length, not a short hose. Laboratory results can flatter. Real systems contain elbows, deposits, and imperfect joints. Selecting a larger pump for safety may increase energy use. It may still fail under poor suction conditions. I have found that careful layout often helps more than extra motor power. Initial assumptions can be wrong.

Identifying Your Fluid and Flow Requirements

Choosing a self-priming pump starts with the fluid, not the pump casing. Record viscosity, temperature, density, vapor pressure, and suspended solids. Water-like liquids behave differently from thick sludge or abrasive wastewater. Particle size matters too. A small strainer can reduce blockage, but it may also increase suction losses.

Measure the required flow in cubic meters per hour and the total dynamic head at that flow. Include pipe length, elbows, valves, elevation, and discharge pressure. Hydraulic Institute guidance recommends evaluating the complete system curve, not only the pump’s maximum rating. A pump rated for 40 m³/h may deliver much less through a restrictive pipeline. It can also run inefficiently near shutoff.

Suction lift deserves careful attention. The U.S. Department of Energy’s Pumping Systems Sourcebook reports that pumping systems may consume 25% to 50% of industrial electricity in some facilities. Correct sizing can therefore reduce wasted energy. Check the available NPSH against the pump’s requirement, especially with hot liquids. Field measurements often disagree with design assumptions. A clean spreadsheet is not proof. Recheck flow using a calibrated meter, and inspect whether air enters through loose suction joints. Even experienced operators miss this. The final selection should match real operating conditions, including occasional solids, changing demand, and imperfect maintenance.

Matching Pump Materials to Operating Conditions

How to Choose the Right Self Priming Pump?

Matching Pump Materials to Operating Conditions

Choosing a self priming pump begins with the liquid, not the flow rate alone. Water quality, temperature, acidity, and suspended solids all affect material performance. Cast iron suits many clean-water duties and offers practical strength. However, untreated cast iron can corrode in salty or acidic service. Stainless steel provides better resistance for damp, mildly corrosive environments. For chloride-rich water, a higher-grade stainless steel may be safer.

Check the whole wetted assembly. The casing may survive, while the impeller or seal fails early. Elastomers must match the liquid and temperature range. EPDM often handles water well, while other compounds suit oils or solvents. Plastic materials, such as polypropylene or PVDF, can work with aggressive chemicals. They may not tolerate heavy impacts or high temperatures. Small details matter.

Abrasive liquids require special attention. Sand, grit, and crystallized solids can wear impellers, wear plates, and mechanical seals. In these conditions, hardened components or replaceable wear parts may reduce downtime. Practical inspections should compare the pump’s material chart with real site conditions. Laboratory water is rarely identical to process water. This is where selection becomes imperfect. A modest temperature rise, unexpected cleaning chemical, or hidden chloride level can change the result. Ask for compatibility data, operating limits, and seal recommendations before ordering. Test assumptions against actual samples whenever possible.

Comparing Priming Height, Pressure, and Efficiency

Choosing the Right Self-Priming Pump: Priming Height, Pressure, and Efficiency

Priming height is often the first practical limit. It describes how high the pump can lift liquid before stable flow begins. Check the stated height under real conditions, not ideal laboratory conditions. Long suction pipes, warm liquids, narrow fittings, and small air leaks can reduce performance sharply. A flooded suction line may hide installation problems during testing. I once treated the published height as a guarantee. That was too optimistic. Measure the actual vertical distance and keep the suction pipe short, airtight, and gently sloped.

Pressure must match the system’s total dynamic head. This includes elevation, pipe friction, valves, filters, and the required outlet pressure. A pump with high maximum pressure may still deliver poor flow at your working point. Use a performance curve, then compare flow and pressure together. Efficiency matters there, too. Operating far from the best efficiency point can increase heat, noise, and energy use. Small errors become expensive during long daily operation.

Tips: Confirm the liquid temperature and viscosity before selection. Test the pump with the real suction length. Leave a safety margin, but avoid excessive oversizing. Record flow, pressure, and power during commissioning. Recheck them after several weeks, because changing filters or worn seals can alter the operating point.

How to Choose the Right Self Priming Pump? - Comparing Priming Height, Pressure, and Efficiency
Pump Type / Typical Size Typical Flow Range Practical Priming Height Typical Maximum Pressure Typical Hydraulic Efficiency Recommended Liquid and Application Main Selection Considerations
Compact centrifugal self-priming pump
25–40 mm connection
2–15 m³/h Up to approximately 6–7 m 2.5–4.0 bar 40–55% Clean water, light irrigation, drainage, and small transfer duties Low purchase and operating cost; suitable when flow and pressure requirements are modest.
Medium centrifugal self-priming pump
50–80 mm connection
10–60 m³/h Up to approximately 7–8 m 3.0–6.0 bar 50–68% Irrigation, construction-site dewatering, process-water transfer, and wastewater with limited solids Provides a practical balance between capacity, pressure, energy use, and equipment size.
Large centrifugal self-priming pump
100–150 mm connection
40–250 m³/h Typically 6–8 m; lower at high flow 3.5–7.0 bar 60–75% Municipal drainage, flood control, large-scale irrigation, and industrial water transfer High efficiency at the design duty point; requires correctly sized suction piping and adequate engine or motor power.
Solids-handling centrifugal self-priming pump
50–150 mm connection
15–250 m³/h Usually 5–7 m 2.5–6.0 bar 45–65% Sewage, sludge-containing water, stormwater, and construction-site liquids with suspended solids Choose based on solids passage, impeller design, wear resistance, and clean-out access rather than efficiency alone.
Positive-displacement self-priming pump
25–100 mm connection
0.5–80 m³/h Often 7–9 m, depending on design 5–15 bar 55–80% Viscous liquids, metering, chemical transfer, and applications requiring steady flow at higher pressure Can generate high pressure at low speed, but requires relief protection and may be less suitable for abrasive solids.
Air-assisted or vacuum-assisted self-priming system Varies by pump and vacuum system Approximately 8–9 m in favorable conditions Depends on the connected pump Lower overall system efficiency due to auxiliary energy use Deep suction lifts, intermittent service, long suction lines, or installations where rapid automatic priming is essential Higher installation complexity and maintenance; useful when conventional centrifugal priming height is insufficient.
Important: The figures above are representative engineering ranges for preliminary comparison. Actual priming height, pressure, flow, and efficiency depend on liquid temperature and viscosity, suction-pipe diameter and length, elevation, impeller design, speed, system losses, and the pump’s duty point. For centrifugal pumps, practical suction lift is normally limited to about 7–8 m because atmospheric pressure and vapor-pressure effects restrict available net positive suction head.

Checking Installation, Maintenance, and Safety Needs

Choosing the right self-priming pump starts with the installation site. Measure the suction lift, pipe length, fluid temperature, and required flow rate. A pump may appear powerful, yet struggle with a long or narrow suction line. Keep the suction pipe short, straight, and airtight. Use the correct foot valve when the system requires it. Place the pump on a stable, level base. Vibration often begins with poor alignment.

I have seen pumps fail because operators assumed self-priming meant self-maintaining. It does not. Check the priming chamber, seals, fittings, and electrical connections regularly. Watch for unusual noise, rising temperature, or slow discharge. These signs often appear before serious damage. Never allow the pump to run dry unless its design permits it. Isolate power before inspection, and follow local electrical and workplace safety requirements. My own judgment can be imperfect, so the operating manual and site risk assessment should guide final decisions.

Tips: Confirm the pump can handle the fluid. Verify suction and discharge directions before startup. Install guards around rotating parts. Keep the area ventilated and dry. Record maintenance dates and observed defects. Test emergency isolation controls during planned inspections. Do not ignore small leaks. They may indicate damaged seals, loose joints, or harmful pressure changes.

How to Choose the Right Self-Priming Pump?

Installation, maintenance, and safety requirements should be evaluated together. The chart shows practical baseline intervals commonly used for planning self-priming pump inspections; always confirm the final schedule against site conditions and the pump manufacturer's instructions.

×

Cart